Saturday, February 27, 2010

Toddler Robe


I found this pattern at JoAnns the other day and while it is probably the worst pattern ever written I am very happy with the results (mainly because I love the fabric). This is definitely a project where a serger would have helped it look a bit more polished but since it is for a 2 year old I doubt he cares.

Also in other news, they finally finished our front door!!!! YAY!


Wednesday, February 24, 2010

Lined Boxy Pouch and Zipper Pouch

 
Here are the matching zipper pouches that I made to go with my new bag. I used a great tutorial that I found online to make a lined boxy pouch. Most of the tutorials leave raw edged seams which bugs me so I was happy to find this one.


Also my friend Capricious is planning on opening an Etsy shop in the near future and I helped her put together a banner for her shop. Here is a peek...


...and of course matching business cards...


Tuesday, February 23, 2010

Sewing Bag

 
Remember my bag envy? Well, problem solved, I am now the proud owner of this fantastic sewing bag. I just finished making it last night (it is a Butterick pattern). I also made a roll to hold all of my sewing tools. I still plan on making a few boxy pouches and zipper bags and maybe a matching tote so that I have an entire matching set for if I ever sew on the go. So hopefully there will be more photos of projects coming soon!


Saturday, February 20, 2010

Double Nine Patch Quilt

 
This is my first attempt at a very traditional quilt and I am in love with it! I used about half a Moda jelly roll to make this lap sized quilt. It is perfect for snuggling in and it is going to be a gift for my husband's grandmother. I hope she loves it too.


The one big learning I had while doing this quilt is that if you have a Viking Sapphire sewing machine and you are free motion quilting it is apparently VERY important to leave your thread in the horizontal position. I broke easily 8 needles trying to figure that one out...

PS. Check out my new Etsy Shop banner...


Sunday, February 14, 2010

Three Button Wrap


I recently saw this post on a blog that I occasionally pop in on and it inspired me to pick up my knitting needles once again. I have cast on and will hopefully be sharing a pattern soon (it is essentially a giant scarf so I decided to just wing it rather then use the pattern that is on Ravelry)! I think in addition to knitting one of these I have been thinking about just buying a nice knit fabric and borrowing a serger to do the edges and sewing one of these up. It would be a lot faster and it seems like a wrap is something that it would be nice to have more then one of.

The other post that African Kelli recently posted was a post with a homemade falafel recipe! I have become a big fan of falafel and I can't wait to try this recipe as they are baked and not fried! YUM!


Saturday, February 13, 2010

A Trip To The Aquarium

 
Today we decided to take Chase to the Aquarium. Overall it was an overpriced experience but we did have fun and I got a few cool photos and most importantly Chase enjoyed it (although I think his favorite part was the free bubble machine).


Monday, February 8, 2010

Shirring Tips


I finished my first shirred project today and I am thrilled with the result.


Here are the tips that I have:
- Use a straight stitch and set your tension on the highest setting and your stitch on the longest length (I was using a stretch fabric so I also made sure to use a stretch needle)
- Hand wind your bobbin with elastic thread - don't stretch the elastic as you wind the bobbin but make sure that there isn't any slack either
- Load your bobbin like you normally would and pull up the elastic bobbin thread as you would pull up regular thread
- Back stitch at the beginning and end of each row like you would if you were sewing with regular thread
- Make sure to leave long enough tails of thread when you start and finish sewing (some sites recommend tying knots at the beginning and end of each row but since I backed stitched in each place and ended up sewing over the seams anyways I didn't bother with the knots)
- When making the top I measured my bust and multiplied by 1.25 and divided that number by two (basically the total width should be 25% wider then your bust but since you are making two pieces you have to divide by 2)
- If you are rather busty like myself I would make sure to make the top on the longer side so that once it is all shirred and over your bust line it doesn't turn out too short
- I don't have a serger so I ended up using a satin stitch to finish my edges and since I was using a stretch fabric I got a nice little ruffled look
- When you start sewing/shirring sew your first row straight across, then for the following rows make sure to stretch the fabric out as you sew
- To make the ruffle at the top I just started my shirring a bit farther down the fabric (2.5 inches to be exact) and then folded the ruffle down over the shirring and straight stitched across the top when I was finished
- I used a stretch fabric overcast stitch to sew my two pieces together but I am sure a straight stitch would work fine
- Use a steam setting and iron over the shirred area when you are done, this will make it crinkle up nicely


Sunday, February 7, 2010

Why I Don't Do Stretch

 
Here are pictures of my first unsuccessful stretch fabric project.


Things that didn't work out very well:
- When I made my pattern I apparently didn't do a very good job because it ended up being way to small (hence the reason I look a bit squeezed into it). Oops.
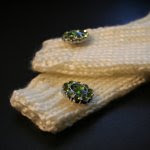
- Due to my fear of stretch fabrics I haven't worked with them at all and so it never occurred to me while I was cutting out the pattern to make sure the grain of the fabric was going in the correct direction so that the final piece would stretch the right way. To anyone who has used knit fabric before this is probably a "duh" but I did it wrong the first time I cut my fabric.
- Sewing the edges of stretch fabrics without a serger = rather difficult. Basically I did a double straight stitch and the fabric got a little wavy and the entire thing looks very amateur. If I do something like this again I think I will do a lace edging which would probably look way better.

Things that did:
- I was happy with the little ruffle at the bottom of the top, I used the highest tension on my machine and the longest stitch and it worked out quite well. The only tip I have is to make sure that your thread ends are long enough when you make your ruffle.


Hopefully my next project will work out a bit better.